How to Create a 2021 Vision/Moodboard
Hey my lovelies, hope you are well and welcome back to another post. On the blog today I will be talking you through a step-to-step guide on how I created my 2021 vision/moodboard. Now, I am by no means an expert in moodboards, manifesting and affirmations, but this year I am aiming to have a more positive outlook on life by putting positive thoughts and feelings out into the universe in the hopes they will be returned in my day to day life.
One of my personal aims for this year is to start my day by actively manifesting and meditating, including writing down three things I am grateful for each morning. I think this is a really beautiful and positive way to start the day, and let's face it, that is something we could all use a little more of right now. If you have any tips or tricks for manifesting/meditating/affirmations, including good meditation apps/videos on YouTube, if you could leave them in the comments below or send me a DM on Instagram (@faithtrustandlotsofbooks) I would really appreciate it. So, grab yourselves a cup of coffee and some biscuits whilst I talk you through the step-to step guide on how I created my moodboard for 2021.
✨Step One - Write It All Down✨
If you haven't done this yet, then I would recommend starting by writing yourself a little list of your goals, manifestations, hopes and dreams for 2021. It does not matter how big or small you feel they are, writing them down can be your first step to achieving them. So, grab your favourite notebook and pen, or open up a new note in your phone, and get those goals down on paper.
✨Step Two - Research✨
Next step is to have a browse on Pinterest, Instagram, Google Images for picture which capture the goals which are on your list. I found it useful to create a board on Pinterest which was dedicated to this, but if you're creating this board on your phone or laptop then simply downloading and saving the images in your camera roll or file on your computer is great.
✨Step Three - Finding the Right Software✨
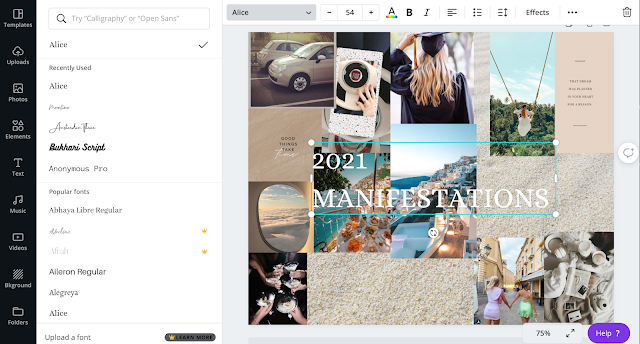
Thirdly, find yourself an application/website which works for you and has the right tools to create the moodboard you want. Personally, I used an app/website called 'Canva', which I already use to design my blog logos and images. On Canva, you can search templates, which is really useful as they have one specifically designed for moodboards. By selecting this template, you have access to multiple different themes or the opportunity to create a personalised one by simply adding your own images, which was how I decided to create mine.✨Step Four - Let's Get Creative✨
Now it is time for the fun bit! It is time to start adding your images to the template and get creative. Obviously, how you design this is all based on personal preference and you can edit/crop/move images across the page of your template. One of the things I love about Canva is that once the images have been added to the template, you can apply filters and edit the brightness, temperature, colour balance etc. of your photos to suit your chosen aesthetic.
✨Step Five - Adding Text✨


Comments
Post a Comment